

Your garage floor houses a lot – a car, car parts, bikes, boxes, tools, and tons of other possessions. So what can you do to protect your garage floor, and prevent that dreaded dust from being attracted to it? Well, painting it is a great option.
Floor problems
First, you need to ensure that your garage floor is moisture proof – and isn’t damp. If your floor is damp then it is unlikely the paint will be able to sit and dry properly on the surface, and this could cause more problems.
You can tell if your garage floor is damp, wet or has moisture problem as there maybe visible white crystals or white powder lying on the surface. This is caused by moisture coming through the concrete. You may also see damp patches on the floor, or your garage could smell musty. If these signs are found in your garage then you’ll have to address these problems first, before you start painting your floor.
There are many ways to test if your garage floor has moisture problems; an easy test to do is to place clear plastic sheeting on the floor, secure it in place by taping it down, and leave it for between 16 and 24 hours. When you come to take the sheet off, if there is any condensation on it, or the floor is wet or darker where the sheet has resided, then it will be considered too wet to paint.
Other concerns include saturated oil, grease stains and any preservatives that may have been added, spilt or leaked onto the floor previously. If your garage floor has either of these then it will more than likely never be able to be painted, as the paint won’t be able to adhere to it – and will become patchy as a result. If the floor has previously been painted, and is now flaking off, this will also cause problems when painting a new coat.
Cleaning
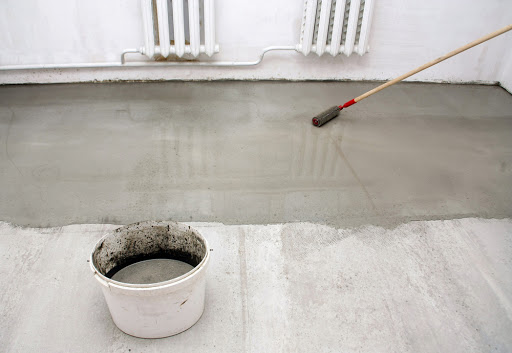
Before painting your floor you’ll need to clean it with an alkali detergent, and/or a degreaser commercial cleaning fluid. Apply the solutions, abiding by the precautionary instructions that will be on the packaging of the cleaner, onto your floor. It’s best to do this with a broom, so you can really get into any grooves on the floor. Let the cleaner soak for three to five minutes, but don’t let it dry. Once fully cleaned, wash the floor with clean, fresh water, making sure all the cleaning product has been removed from the floor, and let air dry.
Preparation
It is crucial to properly prepare your floor for a coat of paint. If not, it can take months for a problem to show through, and for you to fix it. This will end up costing more money as it will be likely that you’ll have to start the whole process again.
Acid etching is a preferable way to prepare your garage floor. It helps the floor to become porous and accept the paint you’ll be applying to it. It does, however, need a flat surface to be applied to, as you don’t want it running onto other surfaces. Once etched the floor will need to be rinsed thoroughly several times. You can also grind the floor, which may be a little more practical for your average garage floor. This is safer and easier to do than acid etching, but will produce the same desired effect.
Painting
The most popular form of paint for your garage floor is a solid acrylic stain. They come in a range of colours and will help in protecting your garage floor from spills and stains. There are many reputable manufacturers who can provide you with your exact choice, so it would be wise to do some research on what it is you ideally want from painting your floor – and buy a product accordingly.
Once painted, leave it to dry, cure and fully settle for five days before you place your car back in the garage. By painting your garage floor you’ll be helping to protect it. The floor will be easier to keep clean, as dust won’t settle as much as it would without being painted, and it will be protected for years to come.


